前回の記事で、Djangoの環境構築について記載しました。今回は、簡単にWebアプリケーションを作成してみます。
前回の続き
まず、最初に設定したpython 3.8.2にしてみる。
ログイン時に適用されるかと思いきや、pyenvまでのパスがとおってなかったので、.bash_profileを読み込んでみる。
# source ~/.bash_profile現状のpythonのversion 確認
# pyenv version
3.8.2 (set by /root/.pyenv/version).bash_profile内で、pyenv init -コマンドをたたいているので、pythonのversionを確認すると3.8.2になっている。
# python --version
Python 3.8.2
virtualenvで作成した仮想環境に入る。これで、なにをpipでインストールしても大丈夫。
# source test/test_project/bin/activate※以降は基本的に、virtualenvの仮想環境上で実行してます。(test_project)がコマンドの先頭についているのは、仮想環境上でコマンドを実行しているという意味です。
※開発するためのディレクトリ(django)をHostOSと共有してます。そのディレクトリに入る。
(test_project) # cd django/アプリケーションのプロジェクトを作成する前に、Djangoのversionを確認しておく。
(test_project) # python -m django --version
3.0.4
プロジェクトを作成する。
(test_project) # django-admin startproject myappプロジェクトのディレクトリが作成されているので、移動する。
(test_project) # ls
myapp
(test_project) # cd myapp
treeコマンドで中身のファイル構成を確認すると、このようになっている。
※treeコマンドは、yum install treeでインストールできます。
(test_project) # tree
.
├── manage.py
└── myapp
    ├── asgi.py
    ├── __init__.py
    ├── settings.py
    ├── urls.py
    └── wsgi.py

1 directory, 6 files
早速、サーバを起動してみると。エラーが出た。
(test_project) # python manage.py runserver 192.168.XX.XX:8000
Watching for file changes with StatReloader
Exception in thread django-main-thread:
Traceback (most recent call last):
...
    raise ImproperlyConfigured('SQLite 3.8.3 or later is required (found %s).' % Database.sqlite_version)
django.core.exceptions.ImproperlyConfigured: SQLite 3.8.3 or later is required (found 3.7.17).
sqliteのversionに問題がありそうだが、そもそもsettings.pyも修正していないといけないので。そちらを先に行う。
settings.pyの変更
まず、settings.py用のディレクトリを作成する。そして、以下のようにローカル環境と本番環境用のファイルも用意する。
ディレクトリを変更したので、settings.pyの内容も変更する。
## settings.py ##
BASE_DIR = os.path.dirname(os.path.dirname(os.path.dirname(os.path.abspath(__file__))))

DEBUG = False
local.pyはこんな感じ。mysqlは同じVMの中で動かす予定。
## local.py ##
from .settings import *

DEBUG = True

DATABASES = {
    'default': {
        'ENGINE': 'django.db.backends.mysql',
        'NAME': '<DATABASE>',
        'USER': '<USERNAME>',
        'PASSWORD': '<PASSWORD>',
        'HOST': '127.0.0.1',
        'PORT': '3306',
    }
}
production.pyもこんな感じ。
## production.py ##
from .settings import *

DEBUG = False

DATABASES = {
    'default': {
        'ENGINE': 'django.db.backends.mysql',
        'NAME': '<DATABASE>',
        'USER': '<USERNAME>',
        'PASSWORD': '<PASSWORD>',
        'HOST': '<IP ADDRESS>',
        'PORT': '<PORT>',
    }
}
manage.pyでは、local.pyを読み込むように設定する。
os.environ.setdefault('DJANGO_SETTINGS_MODULE', 'myapp.settings.local')wsgi.pyでは、production.pyを読み込むように設定する。
os.environ.setdefault('DJANGO_SETTINGS_MODULE', 'myapp.settings.production')DBのインストール&設定
以下を見てください。長くなるので、記事を分割しました。
Django用にMySQL8.0をインストールする
Webアプリケーションの起動
再度、以下コマンドで開発用のWebサーバを起動しようとしたら、またエラーが出力された。
(test_project) # python manage.py runserver 192.168.XX.XX:8000
...
django.core.exceptions.ImproperlyConfigured: Error loading MySQLdb module.
Did you install mysqlclient?
pipでmysqlclientをインストールする必要がある。
インストールする前に、現状のpipでインストール済みのパッケージを確認しておく。
(test_project) # pip list
Package    Version
---------- -------
asgiref    3.2.7
Django     3.0.4
pip        20.0.2
pytz       2019.3
setuptools 41.2.0
sqlparse   0.3.1
mysqlclientのインストールを試みると、エラーが出力された。
(test_project) # pip install mysqlclient
Collecting mysqlclient
  Using cached mysqlclient-1.4.6.tar.gz (85 kB)
    ERROR: Command errored out with exit status 1:
     ...
        from _ctypes import Union, Structure, Array
    ModuleNotFoundError: No module named '_ctypes'
    ----------------------------------------
ERROR: Command errored out with exit status 1: python setup.py egg_info Check the logs for full command output.
いろいろ調べたが、以下で解決した。
# yum -y install libffi-devhttps://pypi.org/project/mysqlclient/
に記載されているパッケージをインストールする。
# yum install python-devel python3-devel mysql-develpyenvでpython 3.8.2を再インストールする。
# pyenv install 3.8.2
pyenv: /root/.pyenv/versions/3.8.2 already exists
continue with installation? (y/N) y
Downloading Python-3.8.2.tar.xz...
-> https://www.python.org/ftp/python/3.8.2/Python-3.8.2.tar.xz
Installing Python-3.8.2...
Installed Python-3.8.2 to /root/.pyenv/versions/3.8.2
再度、mysqlclientのインストールを試みると、OK。
(test_project) # pip install mysqlclient
Collecting mysqlclient
  Using cached mysqlclient-1.4.6.tar.gz (85 kB)
Installing collected packages: mysqlclient
    Running setup.py install for mysqlclient ... done
Successfully installed mysqlclient-1.4.6pipでインストールしたパッケージをrequirements.txtに出力しておく。
(test_project) # pip freeze > requirements.txt
(test_project) # ls
manage.py myapp requirements.txtmigrateコマンドでDBに設定を反映する。
(test_project) # python manage.py migrate
Operations to perform:
  Apply all migrations: admin, auth, contenttypes, sessions
Running migrations:
  Applying contenttypes.0001_initial... OK
  Applying auth.0001_initial... OK
  Applying admin.0001_initial... OK
  Applying admin.0002_logentry_remove_auto_add... OK
  Applying admin.0003_logentry_add_action_flag_choices... OK
  Applying contenttypes.0002_remove_content_type_name... OK
  Applying auth.0002_alter_permission_name_max_length... OK
  Applying auth.0003_alter_user_email_max_length... OK
  Applying auth.0004_alter_user_username_opts... OK
  Applying auth.0005_alter_user_last_login_null... OK
  Applying auth.0006_require_contenttypes_0002... OK
  Applying auth.0007_alter_validators_add_error_messages... OK
  Applying auth.0008_alter_user_username_max_length... OK
  Applying auth.0009_alter_user_last_name_max_length... OK
  Applying auth.0010_alter_group_name_max_length... OK
  Applying auth.0011_update_proxy_permissions... OK
  Applying sessions.0001_initial... OK
これでやっと、サーバが起動できる。
(test_project) # python manage.py runserver 192.168.XX.XX:8000
Watching for file changes with StatReloader
Performing system checks...

System check identified no issues (0 silenced).
April 04, 2020 - 13:14:53
Django version 3.0.4, using settings 'myapp.settings.local'
Starting development server at http://192.168.XX.XX:8000/
Quit the server with CONTROL-C.これは、settings.pyのALLOWED_HOSTSにホストを追加していないのが原因。今回はローカルでの開発なので、local.pyに追加する。
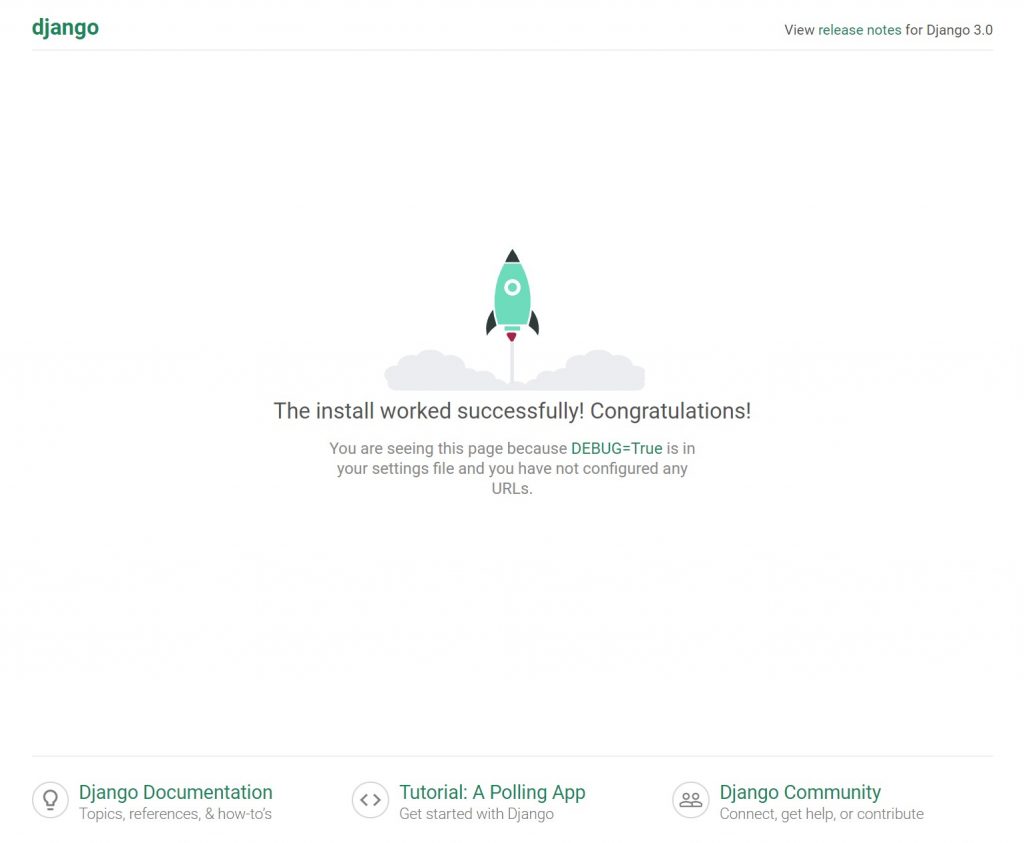
ALLOWED_HOSTS = ['192.168.XX.XX']その後、local.pyを保存すると、Webサーバが自動で再起動される。再度Chromeでアクセスしてみると、djangoのデフォルトのページが表示される。
参考
https://docs.djangoproject.com/ja/3.0/intro/tutorial01/
https://qiita.com/okoppe8/items/e60d35f55188c0ab9ecc
https://qiita.com/hitochan777/items/941d4422c53978b275f8


